


Ever since Shimano XTR M9000 and XTR Di2 were released in 2014, riders, bike mechanics, and tech gurus have been weighing up the benefits and disadvantages of each system. And this has also involved, quite literally, weighing the components of each system as well.
I have been a long-time user of Shimano’s XTR components, with my first XTR equipped bike using M950 in a 2×9 setup, which I bought in 2002. Shimano’s XTR group set has been on all but 4 of the 17 mountain bikes I have owned since then. And one of them ran SLX and another XT. I clearly have a Shimano preference but it’s not without reason.
While I’ve never been very close to the pointy-end of an important race, as an amateur racer it’s nice to know that your equipment is dialled. Or at least, the equipment is pretty much the best and hopefully you have it working properly. There’s a certain reassurance and no bull shit approach to running some of the best gear – if you don’t get the results you want, you know exactly where the blame lies.


Our 2016 bikes were pretty damn versatile – and well-specced. I had Di2 1×11 on my bike all season.
Shimano’s XTR M9000
To me, this group set nailed it. I really liked M980 and M985. I had it on about 4 bikes, plus I encouraged any of our Subaru-MarathonMTB.com Team riders to do the same. I still have M985 brakes on my hardtail and they are still my favourite brake – the M9020s are great too, but an upgrade from one to the other has diminishing returns. Shimano nailed it with the M985.
But when I had the chance to ride a bike with M9000, launched in April 2014, it didn’t take long for me to order the required pieces to make my bike and my fiance’s bikes 1×11 with their new shifter, derailleur, chain and 11-40 cassette. At the time, these were the important pieces to get moving with an 11-speed drivetrain from Shimano.


M9000 adorned my Bianchi Methanol FS.
The reason for the impulse buy which relegated a shelf worth of 10-speed spares obsolete was how light the action of the shift was. While Shimano had introduced the clutch to their rear derailleur, and you could tune it to get the action lighter, it was in no way as light as the action of M9000, especially with their updated low-friction cable.
Even before I upgraded, Shimano XTR Di2 had been introduced. There wasn’t a whole lot on the ground at the time, but it was clear there would be some advantages, most notably with SynchroShift, using one shifter to operate both derailleurs. In early 2015 we saw Dan McConnell and Brendan Johnston go 1-2 at the Australian XCO National Championships on SychroShift. They had the simple shifting of a 1x system, but the chain security, range, and closer gear jumps of a 2x system.
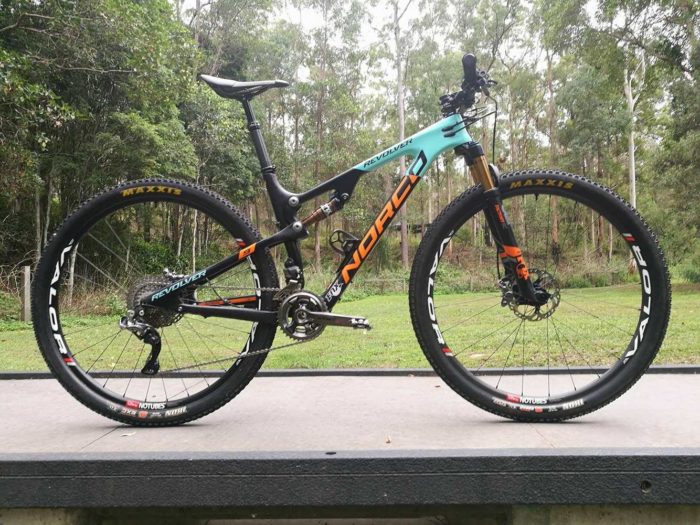
The 11-42 cassette that Shimano introduced with XT 11-speed, and now the 11-46 cassette, improved the range of my 1×11 Shimano XTR M9000 set up – although by the time I fitted the 11-46 I was already on Di2. But the option to go back to a 2x drive train was tempting. When Imogen Smith and I opted to built up a Norco Revolver hardtail each as well as a Revolver FS for 2017, we specced them with 2x drivetrains. Why? We live in Brisbane, it’s hilly. We wanted our hardtails to be awesome for recovery rides, long training days, and long dirt road rides. A great gear range was key.


There’s no denying it’s a sweet collection of bikes.
With the option to go to Di2, and the 2017 Revolver FS frames having a frond derailleur mount, we decided to build our bikes so we could run Shimano XTR Di2 with SynchroShift. The cable location for the front derailleur would allow removing the mech and changing the crank, chain length and shift program if needed for certain races. But it meant we could have an awesome gear range with quick jumps between gears if we needed it.
There was a big question though – what would the weight difference be? Here’s the process of stripping down Imogen Smith’s Norco Revolver 29 FS from a 1×11 Shimano XTR M9000 build, using an 11-42 XT cassette, 67g rotors and M9020 trail brakes – before rebuilding it with a full Shimano XTR 2×11 M9050 build.
Weight differences of a M9000 vs M9050 build
Well this is accurate but not quite what the heading suggests. But the below is what I removed from Imogen’s bike, and the weight. This isn’t the whole group set, as some parts (like the Kogel bottom bracket) remained the same.


That’s the frame, ready for a clean up and rebuild.
Chain guide: 57g
Rear derailleur: 228g
Crank, 170mm, 32t ring: 593g
Shifter, iSpec II: 107g
Cable/outer: 67g
Cassette: 433g
Front brake: 247g
Rear brake: 265g
Rotors: 125g
Chain: 245g
2367g total
The rebuild isn’t quite like for like, as we opted to go for full XTR Race brakes, Shimano rotors included.

The group set, laid out and waiting.
There are more parts for sure with this build, so I weighed them all before fitting.
Head unit: 30g
Rear derailleur: 289g
Fron derailleur: 138g
Shifter: 65g
Junction box and 4x wires: 31g
Battery: 57g
Front brake: 197g
Rear brake: 202g
Rotors: 224
Cassette (11-40 XTR): 323g
Cranks 170mm 28/38: 644
Chain: 245g
Total: 2445g
Obviously swapping the brakes and rotors mixed it up a little bit, but the reality is, the weight difference is marginal. PLUS you gain gear range. That’s not something everyone needs, but if you do – it is worth noting.

Now it’s time to build it all.
Building the Shimano XTR Di2 group set up
I haven’t built up many bikes with Shimano XTR Di2. This was my 2nd really. But the concept is simple: plan out where the battery is going to go, and where the junction box and cables will go. Do this in advance so you know what cable lengths you need! The system figures the rest out for you once connected.
Some frames are more Di2 compatible than others. Our Norco Revolvers are in the middle ground. The front triangle is great, the rear end needs electrical tape. But the ‘Gizmo’ cable port system that Norco use did have cable grommets for the ports, which is a nice touch.


Getting the majority of the build done is like any other bike, fit the rear derailleur (I did the front later), fit the brakes, cut the lines, bleed as required… connect head unit to shifter. Ok, that’s different.

The head unit just looks like a gear indicator, but it is also your charging port, battery indicator, and fine tuner of shifting. Plus it makes the beep noises when you don’t have any gears left. This unit is also Bluetooth capable for customising your shifting with the E-Tube App.

The rear derailleur looks impressive – but really it’s the boring stuff like programming that makes it work.
With the Revolver FS frame, I opted to run the one cable from the head unit (which in turn has a short cable to the shifter), down the inside of the down tube through the same port as Imogen’s KS Lev Ci dropper, to meet a junction box ahead of the bottom bracket shell. A short cable would go to the battery, another to the front derailleur via the port on the seat tube, and another wire would exit below the down tube to the rear derailleur. I set it up outside the bottom bracket shell and pushed it inside. The tension of the Gizmo’s grommet has kept it silent.


Done again I’d wrap some padding around it.
The battery really only fits in either the top tube (from entering in the lower end of the head tube), in the steerer using PRO’s Tharsis Stem, or, in the seat tube tethered to the dropper post cable – which should help for extraction. I padded it up and kept the zip ties longer but really it is super snug. It sits just above the main pivot.

At this point I needed to fit the front derailleur, get the cranks in, put the chain on, and get the whole lot connected and shifting.

The front derailleur – there are some small issues with height, as the Revolver frame was designed pre-Di2. It’s got a port – just not the best clearance for the body of the Di2 derailleur.
At this point you really are just plugging cables into ports. It’s very easy. Limits are set in a similar way. But fine-tuning is done when everything is on and you’re pedalling through the gears in the work stand. I used the head unit to change to ‘S2’ from manual mode (which would need two shifters), and started to play with the e-Tube App after setting up the Bluetooth connection – but stopped as I realised it wasn’t my bike, so shouldn’t meet my preferences for shift speed, chain ring jumps or what each button does.

The head unit’s one button changes modes, and let’s you enter the pairing mode or fine-tuning mode. Your shifter then does the finer points.
Driveway tests ensued, along with some small tweaks for the shift trim, back in the workstand. I was really interested in what the weight difference would be. I had cleaned out excess dried balls of sealant from the rim cavity of the rear Valor wheel, and changed grips from WCS foam to KCNC. The bike was 10.21kg when it went into the stand. And 10.227 when it came out. So it gained 17g.
Benefits of Shimano XTR Di2 2×11
As this bike belongs to Imogen Smith, it is worth bearing in mind she hit the road pretty hard about 9 weeks before I rebuilt her bike. Yanking on the bars isn’t really happening at the moment, nor is mashing big gears. Seated spinning is great. So access to a 28/40 low is fantastic. Plus the single right-hand shifter is useful seeing her left arm is very weak after braking the humerus and tearing the rotator cuff. And I mentioned the low shift load of M9000 earlier – the jump to M9050 is another leap. The lever has a distinct click, and the shift feel never changes. That feel is the same regardless of the conditions, it’s not just when it’s new.
There are actually heaps of other beenfits to the Di2 system, but in this case, for this rider, it gives a wider gear range with a simple actuation for negligible weight gain. For the full specs and options head to Shimano’s website.
Is it a big investment? Yes, it is. I have used a 1×11 Shimano XTR Di2 group set for over a year and I don’t spend a lot of time adjusting my gears. They’re always just good to go. Cable maintenance isn’t a thing. I recharge my battery about every 4-6 weeks. Reluctance to shift on day 6 of a week-long stage race as your thumb hurts… also not an issue. There are heaps of benefits.
But once Imogen has some trail time on this bike, she can report on how it’s changed the ride for her. If you have a question on the build – ask below in the comments.


Post build, all you need to do is charge it up!

There is always a point in a bike build where it gets a bit messy.